March 23, 2013

RIMMEL Lycra PRO Nail polish in 416 NIGHT FLIGHT

March 23, 2013


Not too long ago, I bought a Rimmel christmas pack from Watson's and it came with this Lycra PRO nail colour in 416 Night Flight. 

It is a dark royal purple and has no shimmer or glitter particles in it. It boasts a "mistake free application" due to the "maxi brush" and it really lived up to its name. Application was so easy and basically mistake free! 

The formulation was quite thick but good – one coat can get you an opaque colour. It dries really quickly as well, leaving a shiny finish. Longevity-wise, I'm sure it can live through a week without any major chipping if you're not using your fingers to do much manual work.  

I'm unsure about the retail price in Watson's but asos.com sells Rimmel nail polishes between S$6 - S$10. 

Why can't all nail polish brands come with this brush?!


March 19, 2013

Review: PALTY Bubble foaming hair dye - NAMACHOCO WAFFLE

March 19, 2013

After a couple of years of ditching the DIY hair dyes, I came back to it once more. I've never had a real great experience with DIY hair dye before to be honest. It was either too brown for my liking, or did not have a real effect. The latter was the case of my most recent attempt, with the DIY PALTY Bubble foaming hair dye. Foaming hair dyes are all the craze right now with the easy and fun application, which makes it more than a novelty factor.

I was looking for a dark chocolate brown to even out my hair colour (I've not dyed my hair for more than half a year), nothing too extravagant. There were many brands that were competing across the shelves and the Palty ones stood out to me as being firstly, Japanese (or Asian), it had a middle-price range, and it foams.

I purchased the dye at S$16.20 at Watson's. 


Here is a closer look at the Palty foaming hair dye in NAMACHOCO WAFFLE. The foam was fairly easy to create and apply. Unlike its beautylabo counterpart with a lid to shake the solution (to form the foam), the Palty one only had a cup and a paddle with many holes in it to whip it up to a foam. I wouldn't say it is terribly troublesome or difficult, in fact it was very quick and quite fun.

Put on your gloves, pour the developing liquid (bottle) into the cup and squeeze in the whole of the colour tube as well. Use the paddle to stir the mixture and it quickly becomes foam. Do it until it reaches the line in the inside of the cup. When it has hit the mark, you're ready to dye! I sectioned my hair into 2 - 3 parts and started dying. After 20-30 minutes, I rinsed everything out. The smell of ammonia did not hit me until the product was on my head and was fairly tolerable compared to some other brands that I have tried. 

Here are the results:
To be honest, I'm not so much impressed. The colour was subtle but did not resemble much to the one on the box. I did make sure every part of my hair is covered and massaged the dye in as much as I could. The lower areas of my hair that were already coloured were still lighter than the rest, but the difference is much more gradual (thank goodness). As with hair dye, the colour changes after a week or so. If there is any difference in colour, I'll be sure to update!

Oh yes, one plus point. I LOVE the leave in conditioner that comes with the dye (yellow sachet). LOVE. Why don't they sell it separately? 


<3
HL

March 9, 2013

Reuse!: old liquid liner brush as gel liner brush!

March 9, 2013

I recently finished using the heroine make liquid eyeliner (faster than dolly wink because the it leaked) and thought of so thing to do with it. The fine yet sturdy brush tip was great in drawing straight lines thick or thin and I thought, why not reuse the brush tip for gel liner?

Gel liners can be quite a fuss to use. The product dries relatively quickly on your brushes and it clumps and get really stiff! You often find yourself running out of brushes to use very quickly even though you did wipe of the access product off it!! A pen brush could add to the number of gel liner brushes you have.

I have tried applying my heavy rotation gel liner with the pen and it works quite well. The next time you finished a liquid liner pen, why not use it for gel?

Cheers,
HL

March 8, 2013

What's Up This Week #2

March 8, 2013

So besides the fanatic writing of our FYP paper, the team and I went just across borders to Johor Bahru, Malaysia on Monday for a short getaway. It was quite a funny and tiring day as things went from Yay! to Nay! rather quickly. We didn't venture out much (because I was quite apprehensive aka scared about leaving the comforts of City Square) and things went downhill after we realized that the Bak Kut Teh we wanted to go eat, closed at 5pm. City Square gets pretty boring pretty quickly, and the bulk of money we  I spent was on food.

Bad things aside, I had a great fun time hanging out with my buddies and not thinking about work! ><


HL <3

March 4, 2013

Planning for the Big Trip...

March 4, 2013


So... a few of my friends are going on the big trip to Europe later this year and I thought it'll be good to start writing about my month-long grande évasion to help them with their planning. (Trust me, having tried to plan the itineraries of 10 cities ALONE, you'll need all the help you can get.)

First up, some general pointers:

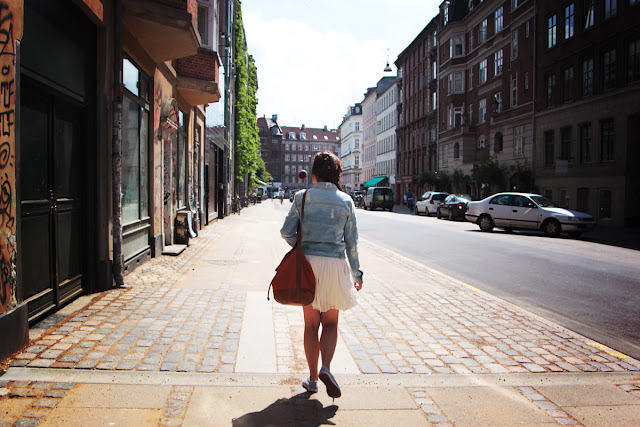
Streets of Nørrebro / Copenhagen
#1. Train up, get fit and make sure you can walk for HOURS.

The big trip might be a once-in-a-lifetime thing for most of us so you will want to make the most of your trip... and not miss out by waking up late (SIGH) and resting excessively (SIGH). I'm immensely guilty of both and I really wonder how much I could have squeezed in if I was a more hardworking traveller. Travelling can get very, very tiring so be prepared for that!

Buckingham Palace / London
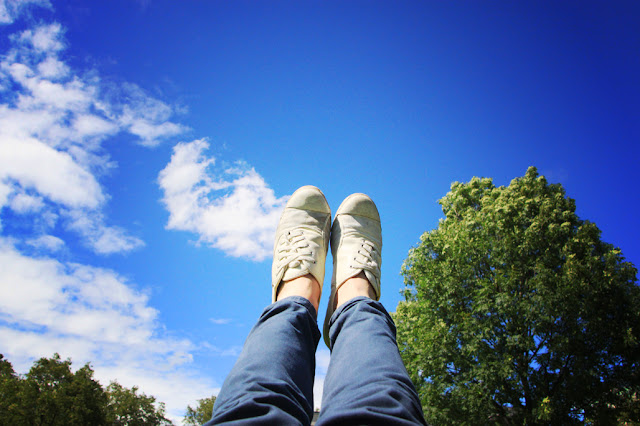
#2. Good footwear.

There'll be a lot of walking involved no matter where you go. Good shoes are a must!

#3. Plan ahead together.

While planning for the trip, it will be good to have at least 2 person slightly familiar with the sights. Having planned most of the itineraries alone, it brought unprecedented amount of stress when something goes wrong. Plan the itineraries together! Having someone to share this responsibility with will make you enjoy the whole planning a lot more. Undeniably, possibilities for clashes will arise but at the end of it you can share the glory of having planned (and conquered) Europe TOGETHER!!!
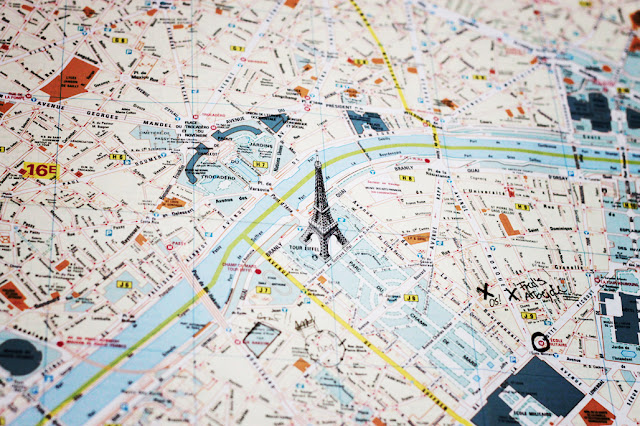
Vintage Paris Map
#4. Prepare lotsa maps!

The very first thing you should buy at every city is a good map. Choose maps with with clear indicators of the major sights. Also, look for maps which includes a separate subway map within. This will help your commute within big cities such as London and Paris tremendously! Maps can be great souvenirs of trip so don't just rely on maps on the iPhone and tablets. (Online maps are great but they can be unreliable and inaccurate sometimes.) Get physical ones!

#5. Check the weather! And bring warm clothes.

I decided to go head to Europe during Summer for frivolous reasons - like wearing sundress and having a lighter luggage. I thought it'll be nice and sunny and the skies blue but we encountered a freak summer. Instead of the nice, cooling 20+ degrees, it was perpetually 12-15 degrees up north and half the time and I felt so cold that I wore three layers of clothing and wore leggings inside my jeans. Check up on the CURRENT weather before you pack! Bring a few warm jackets. That's always useful!

#6. Book tickets for the major sights online.

Don't waste time queuing for the sights and book your tickets online instead! Summer in Europe is packed with tourists so don't get stuck in the queues! Having booked most of the tickets for the attractions online, we managed to a save lots of time in Rome (and snigger at people stuck in the long queues. yes I'm mean like that). There are no additional booking charges online so DO IT!!!

#7. Don't miss out on night admissions!

The sun doesn't set till 10 pm so do check for night admissions! Ultimate time-saver.

#8. It's okay to be lost.

I wished someone had told me that getting lost is part and parcel of travelling. It can be intimidating to be lost in a land surrounded by people speaking in a language you don't know. Now take a deep breath and chill. It happens. Don't get overly anxious and enjoy the process of finding your way around! 


#9. Last but not least, be really, really excited.

And do a little dance whenever you can!


///


Flight:

Holidays in Europe are expensive principally due to the airfare. It's so hard to fork out SGD1500 for airfare! I know the pain, but psst, let me tell you a secret. I bought mine at SGD920 (all inclusive no less!). Ta-dah! *look of triumph* There's a common misconception that you should buy your tickets as early as possible to prevent the eventual heart attack that happens when airfares have risen beyond your budget. My advice would be this: book your tickets during the low-season, which is between March - May or September - December. Most airlines offer sale fares during this period so fret not! I flew Qatar Air, which is a much better airline than SQ imho. 

Accomodation:

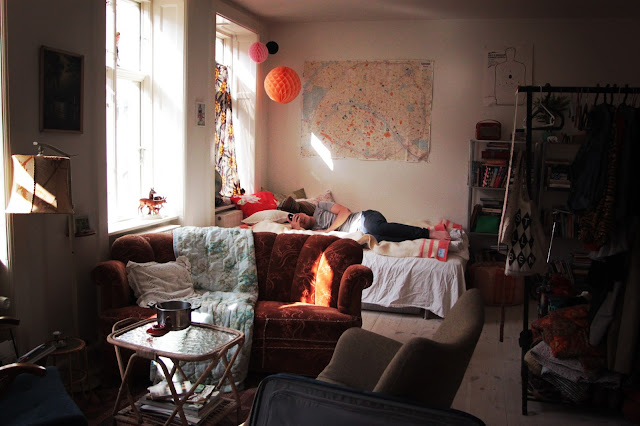
Our apartment in Copenhagen! Dream home.
Definitely one of the highlights of the trip! Lotsa vintage furniture and funny Literature all over. THIS IS LOVE.
Unless you have a budget of 10k or more or am a room service junkie, there is no need to stay in a hotel. Opt for cheaper and much more interesting alternatives, such as hostels or local apartments! Hostels are a great way to meet traveller from other countries (or so I heard) and apartments allows you to live like a local (which I'm a total sucker for). Most apartments comes with a kitchen and a washing machine, which will help save you lotsa $$$! Preparing your own meals will definitely help reduce your expenditure and (reduce panic on getting cheated) while a washing machine allows you to bring less clothes! Win-win! 

French Toast prepared by my Amsterdam Host. :')
Bagels for Breakfast! It is here where I fell hopelessly in love with bagels. 

Throughout my trip, we mainly stayed in the apartments of locals who listed their apartments on airbnb.com. Kinda like renting a house for a few days or couch-surfing but with an actual room. Some of the houses we stayed in are so full of character and the owners are so nice! Our host in Amsterdam made breakfast-to-die for during our stay and we're eternally grateful for her hospitality.


and.... that's that. Hope this helps! 

Next up would be a guide to Rome!


Au revoir!
Tiffany

March 2, 2013

I WANT! Laura Mercier Tinted Moisturizer + Primer

March 2, 2013

Yesterday, I finally had a chance to try the famous Laura Mercier Tinted Moisturizer. Just gorgeous.

It was a day of prowling and sneaking around as my marketing teammates (including Fitrina) and I visited the Benefit Cosmetics counters around town for our presentation this coming Monday. I was very sure we all looked very suspicious snooping around the counters, trying out products, taking their catalogues and booklets and asking many questions. ><  But it was fun! My knowledge of Benefit has officially hit the roof.

Anyway, whilst we were at the beautiful Benefit counter in TANGS Orchard, Fitrina and I crept towards the Laura Mercier counter instead. From previous experience, LM provided samples for their renowned tinted moisturizer and I was really excited to try them. It was pretty upsetting when they told us that they did not have samples! I was kinda devastated...but I went on to let them try the product on me anyways.

In no time, I was sitting on top of the makeup stool and Emily, one of the make up artist at Laura Mercier began removing the makeup on only half of my face. I had light foundation and concealer on with no blush yesterday. After which, she prepped my skin with the Laura Mercier foundation primer which was slightly orange from the tube but transparent on the skin. It felt like a refreshing cool gel. Then she proceeded to put on a couple of light layers of the tinted moisturizer onto the just prepped skin and it really does feel like a light moisturizer with little to no smell at all. My face was so moist and felt to clean, it was surprising to know that it was makeup!

After the tinted moisturizer, Emily went on to add concealer under my eyes and a touch of blush and translucent powder, which immediately brightened up my complexion. The products set quickly and I was left with a moisturized face and an even skin tone. Officially in love.

The cost of the tinted moisturized was S$68 for 30ml. Primer was S$52 for 30 ml, $34 for 15ml.

Have you tried the Laura Mercier Tinted Moisturizer?

;)
HL

Related Posts Plugin for WordPress, Blogger...